banner


How To Repair Cpu Socket Pins

Introduction

This guide volition cover how to gear up a aptitude CPU socket pivot on your motherboard. This volition crave a steady hand in order to carefully movement the pins, since they are very small and fragile.

The reason for this prepare is considering motherboards with a aptitude CPU socket pin accept problem detecting the CPU itself. This fix tin likewise be enable dual-channel, because in that location were a lot of problems enabling dual-channel retentiveness for their computers.

The merely requirements that is needed for this guide a needle, or whatever needles that is tiny enough to fix the pins (in my guide, I will exist using a math compass, since I don't have access to a needle), a workplace without whatsoever hazards such as electricity, and a steady hand.

  1. Make sure you safely removed your motherboard from your computer.

    • Make sure you safely removed your motherboard from your computer.

    • Place your motherboard on a tabular array, or on whatsoever grounded surface that yous are comfy to work on.

  2. Unplug  the CPU power cable connected to the motherboard. Don't pull the CPU Power cable by the wires to avoid damaging them and the CPU power pins.

    • Unplug the CPU power cable connected to the motherboard.

    • Don't pull the CPU Ability cable by the wires to avert dissentious them and the CPU ability pins.

  3. Now, if you have an Intel Cooling Fan, turn the four pins on the CPU cooler counterclockwise.

    • At present, if yous have an Intel Cooling Fan, turn the 4 pins on the CPU libation counterclockwise.

    • And so pull all 4 pins to remove the CPU cooler off the motherboard.

    • If you have a different cooler, or an aftermarket cooler, read your manual for your other cooler to see how to properly remove the cooler.

  4. Now remove the CPU cooler off your motherboard, and place the cooler aside. Now remove the CPU cooler off your motherboard, and place the cooler aside.

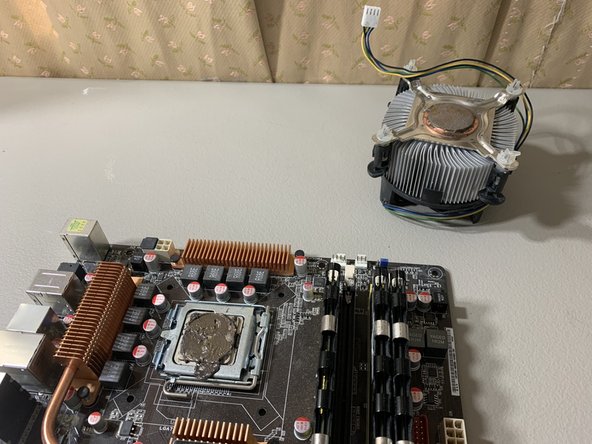
    • Now remove the CPU cooler off your motherboard, and place the libation bated.

  5. Lift the metal clamp in order to remove the CPU itself.  To do this particular step, there is a metal tab which you can push with a little force to carefully raise the metal clamp away after loosening the metal tab. Do not be afraid to use a bit of force when moving the  metal tab. Do not be afraid to use a bit of force when moving the  metal tab.

    • Lift the metallic clamp in order to remove the CPU itself. To do this particular step, at that place is a metal tab which you can push with a trivial strength to carefully enhance the metal clamp away after loosening the metal tab.

    • Do not exist afraid to apply a bit of strength when moving the metal tab.

  6. With your thumb and middle finger, remove the CPU off the motherboard. (Optional) You can clean your CPU with rubbing alcohol. In this guide, you don't have to.

    • With your thumb and middle finger, remove the CPU off the motherboard.

    • (Optional) Y'all can make clean your CPU with rubbing alcohol. In this guide, you don't have to.

  7. As you can see, there are a few bent pins in the CPU socket. It it a bit hard to see the pins since they are very tiny. So, you'll need a needle or any tool to fix the pins in the right directions. Use a needle and gently bend the CPU pins in the right direction where the other CPU pins are facing.

    • Equally you can see, there are a few bent pins in the CPU socket. It information technology a bit hard to meet the pins since they are very tiny. And so, you'll need a needle or any tool to fix the pins in the right directions.

    • Use a needle and gently curve the CPU pins in the right management where the other CPU pins are facing.

    • Advisedly move the pins direction where they are meant to face, because the pins are very fragile.

  8. After fixing the pins, gently place your CPU with your thumb and middle finger into the socket. When reinstalling your CPU back onto the motherboard, try not touch the bottom of the CPU.

    • After fixing the pins, gently place your CPU with your thumb and middle finger into the socket.

    • When reinstalling your CPU back onto the motherboard, try non touch on the bottom of the CPU.

  9. Lock the CPU tray so that the CPU does not fall out of place. You will need a bit of force to push the lock. Lock the CPU tray so that the CPU does not fall out of place. You will need a bit of force to push the lock. Lock the CPU tray so that the CPU does not fall out of place. You will need a bit of force to push the lock.

    • Lock the CPU tray so that the CPU does not autumn out of place. You will demand a scrap of force to push the lock.

  10. Reinstall the CPU cooler and replace the four pins turning them clockwise to secure it to the motherboard. Reinstall the CPU cooler and replace the four pins turning them clockwise to secure it to the motherboard. Reinstall the CPU cooler and replace the four pins turning them clockwise to secure it to the motherboard.

    • Reinstall the CPU cooler and replace the 4 pins turning them clockwise to secure it to the motherboard.

  11. Plug CPU power cable back into the motherboard. Plug CPU power cable back into the motherboard.

    • Plug CPU ability cable back into the motherboard.

  12. And now you have completed this fix! Now all you need to do is to place the motherboard back into your computer, and test to see if you can boot into the BIOS screen.

    • And now you accept completed this prepare!

    • Now all you lot demand to practice is to place the motherboard dorsum into your computer, and test to see if yous can boot into the BIOS screen.

    • The guide only shows how to fix the CPU pin sockets. Putting the motherboard back into your figurer will take more time.

Decision

Overall, this is the only manner to fix of having the CPU undetectable from the motherboard, and enabling dual-channel memory. Some people take to RMA (Render Merchandise Authorization) or return their motherboard to their manufacturer, and receiving with a replacement. RMA'due south may accept time to receive their replacements, depending of the manufacturer.

Team

Embed this guide

Choose a size and re-create the code beneath to embed this guide as a small widget on your site / forum.

Preview

Source: https://www.ifixit.com/Guide/How+to+Fix+a+Bent+Intel+CPU+Socket+Pin/140082

Posted by: hagamanussighboult.blogspot.com

0 Response to "How To Repair Cpu Socket Pins"

Post a Comment

Iklan Atas Artikel

Iklan Tengah Artikel 1

Iklan Tengah Artikel 2

Iklan Bawah Artikel